Set Up the Case
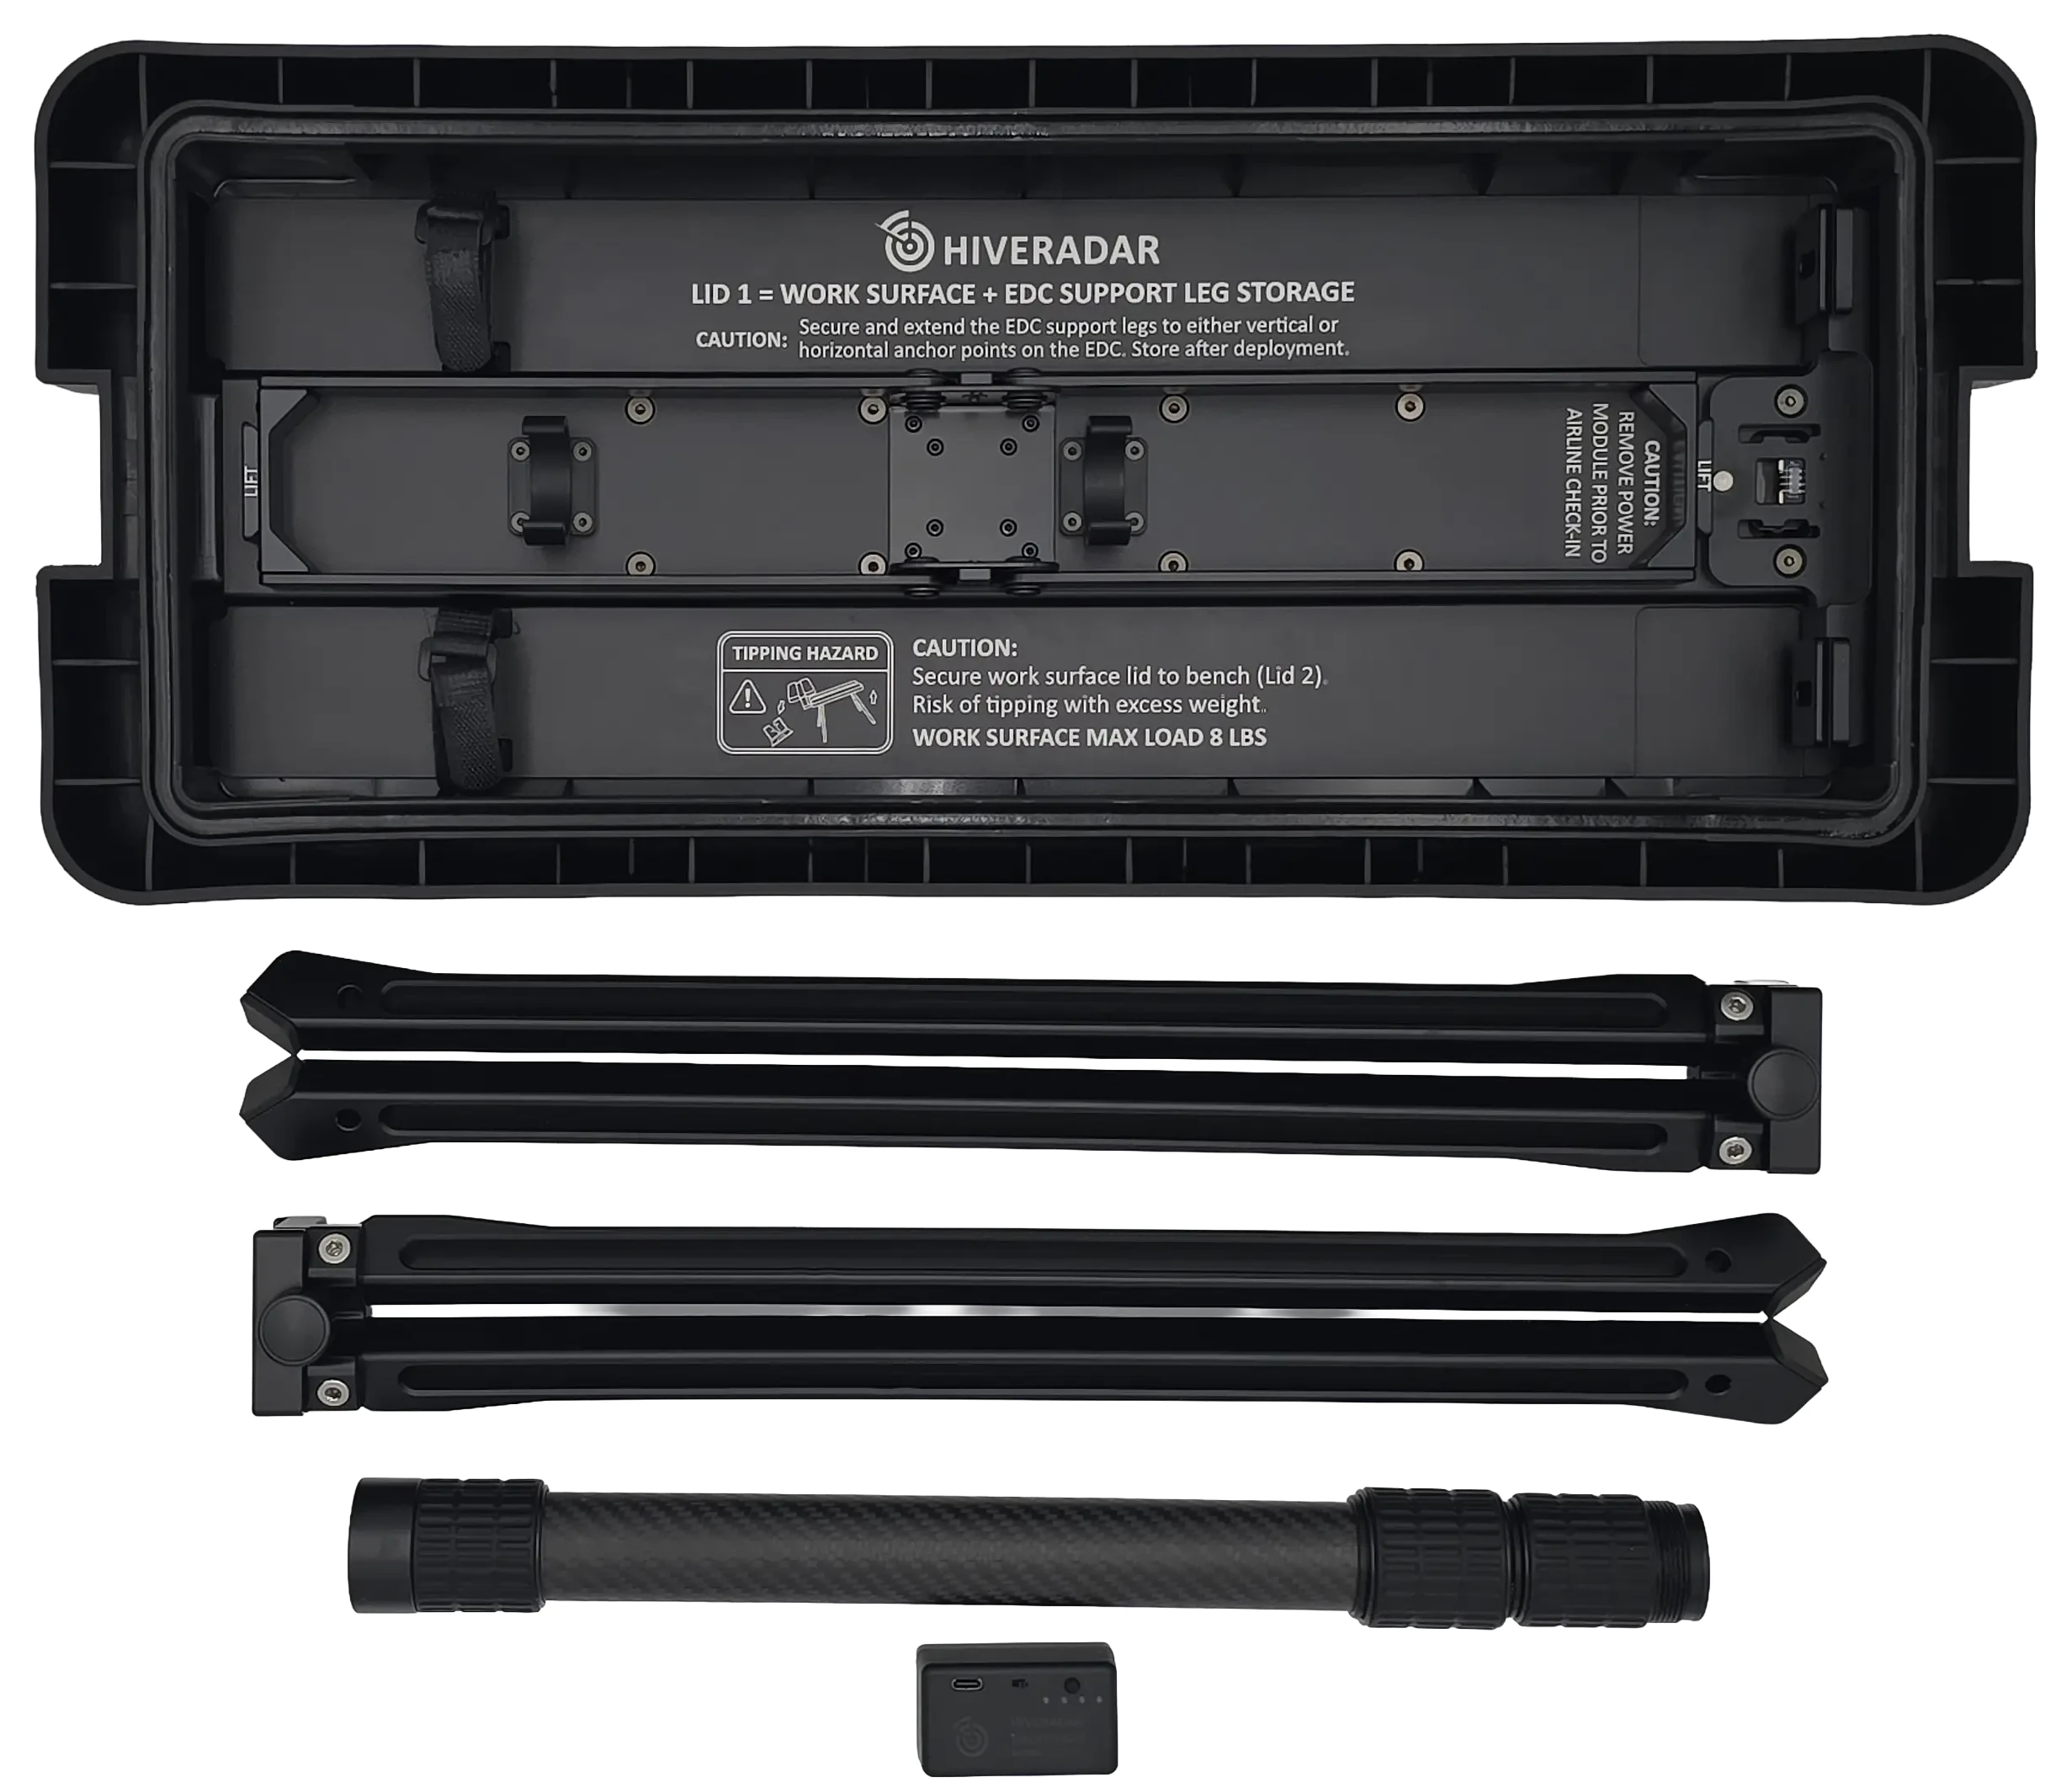
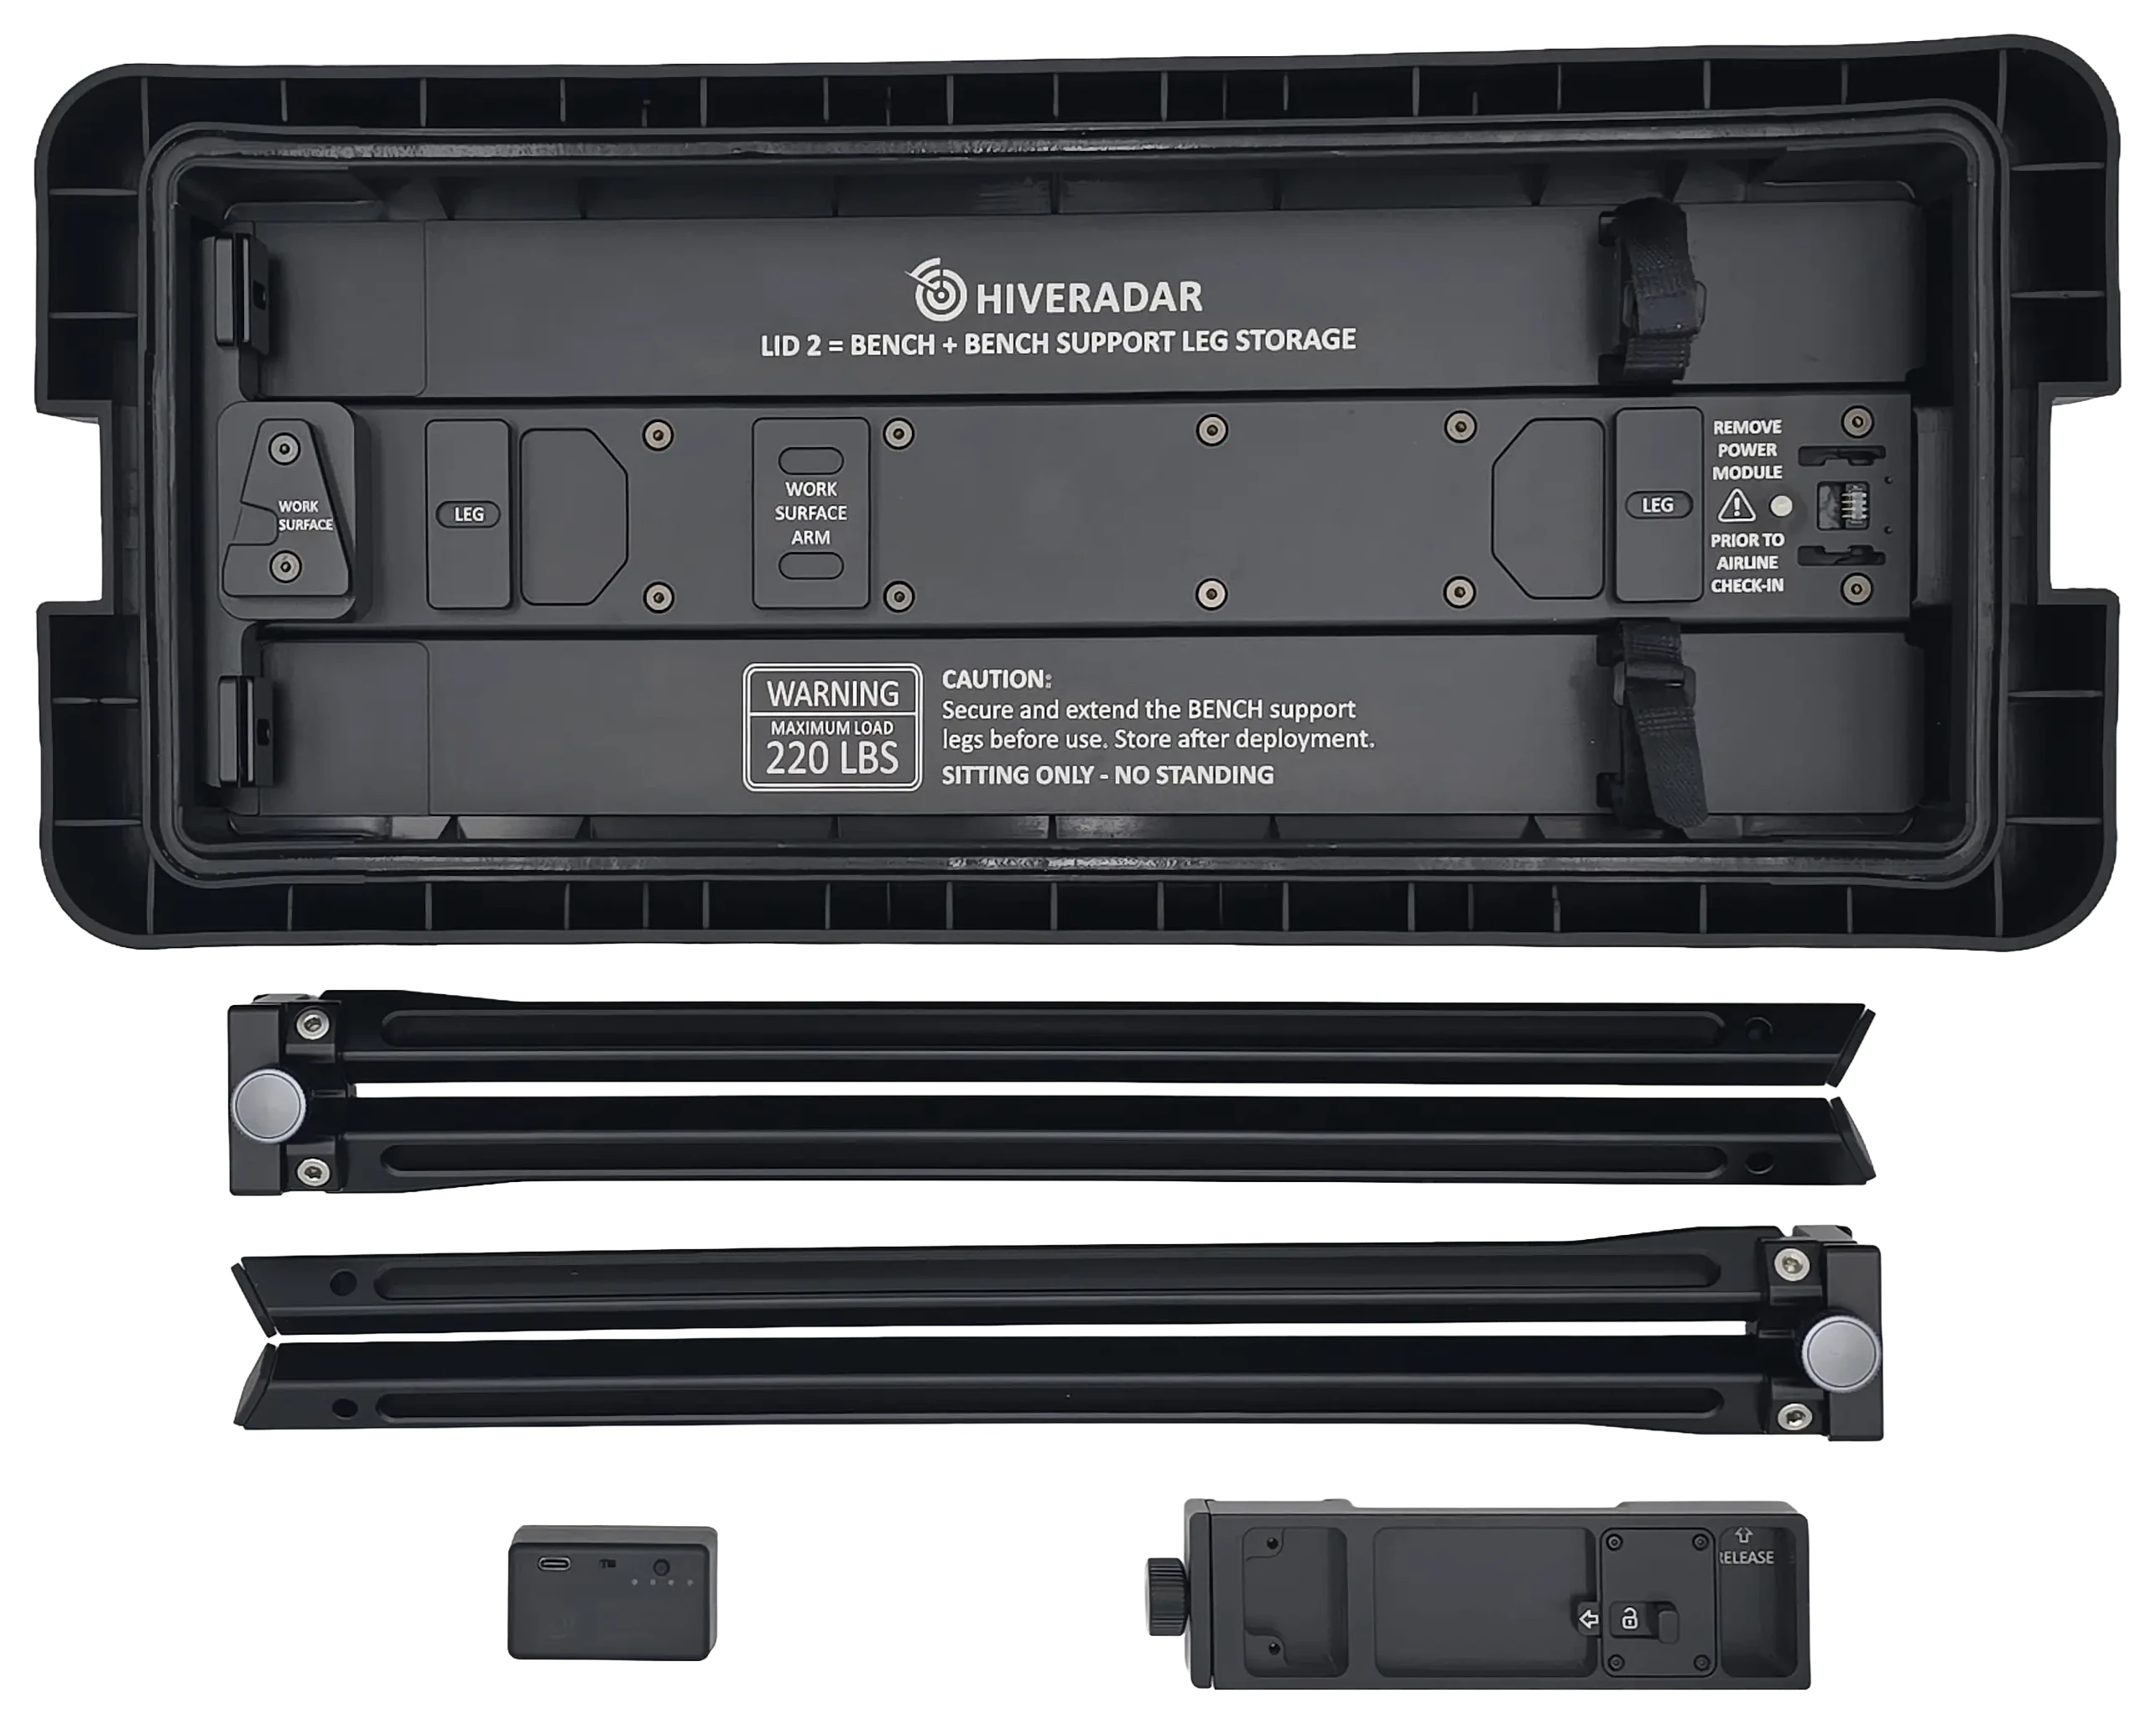
The two lids hold two different sets of legs. The leg sets are not interchangeable: keep each set in its own lid.
| Lid | Printed inside | Holds | Becomes |
|---|---|---|---|
| Lid 1 | "Lid 1 = Work Surface + EDC Support Leg Storage" | 2 EDC support legs, the extension pole | The work surface (8 lb max) |
| Lid 2 | "Lid 2 = Bench + Bench Support Leg Storage" | 2 bench legs | The bench (220 lb max, sitting only) |
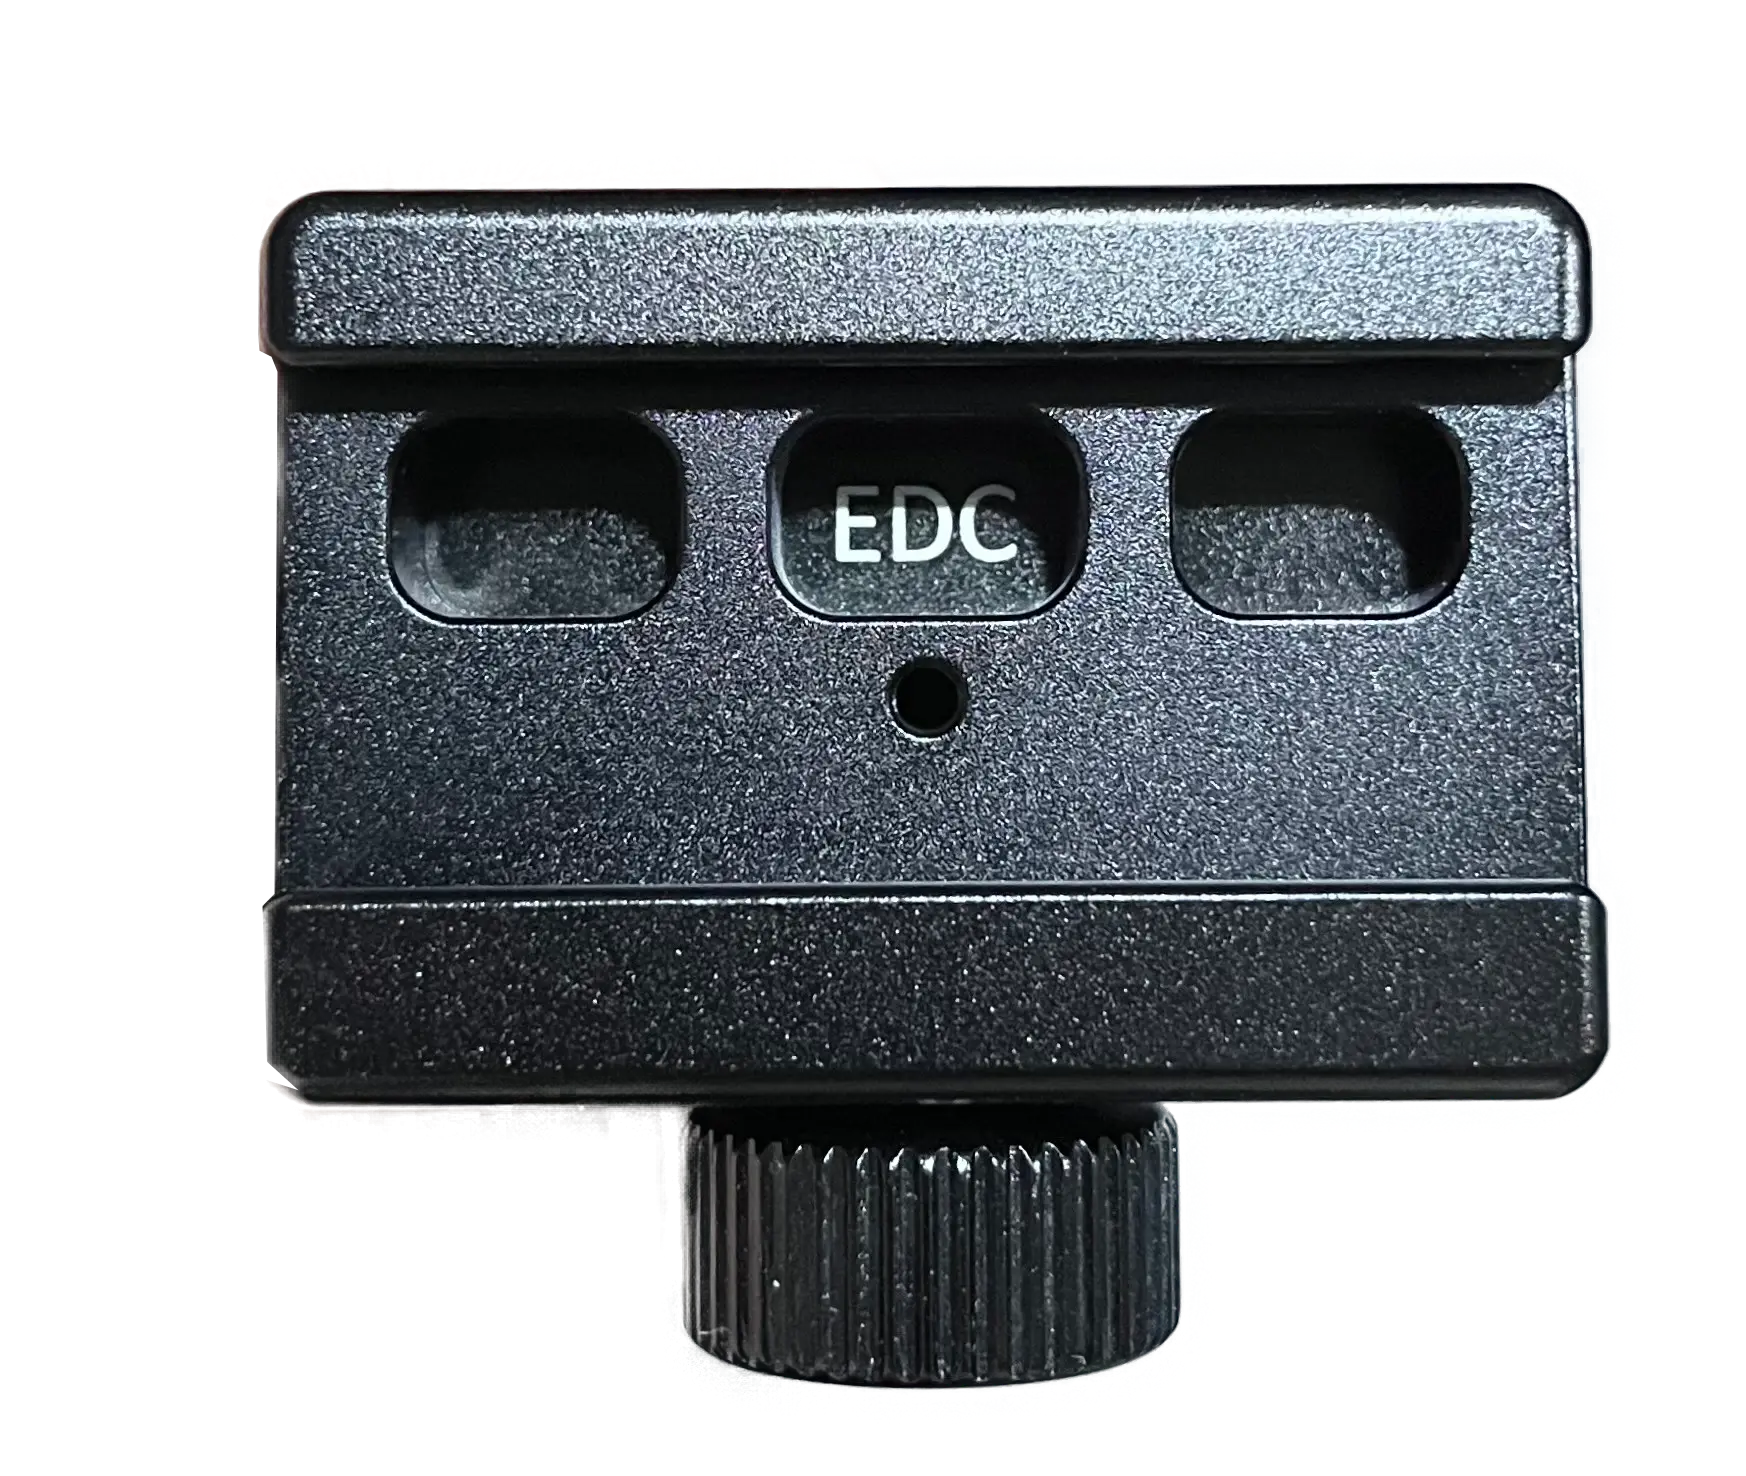
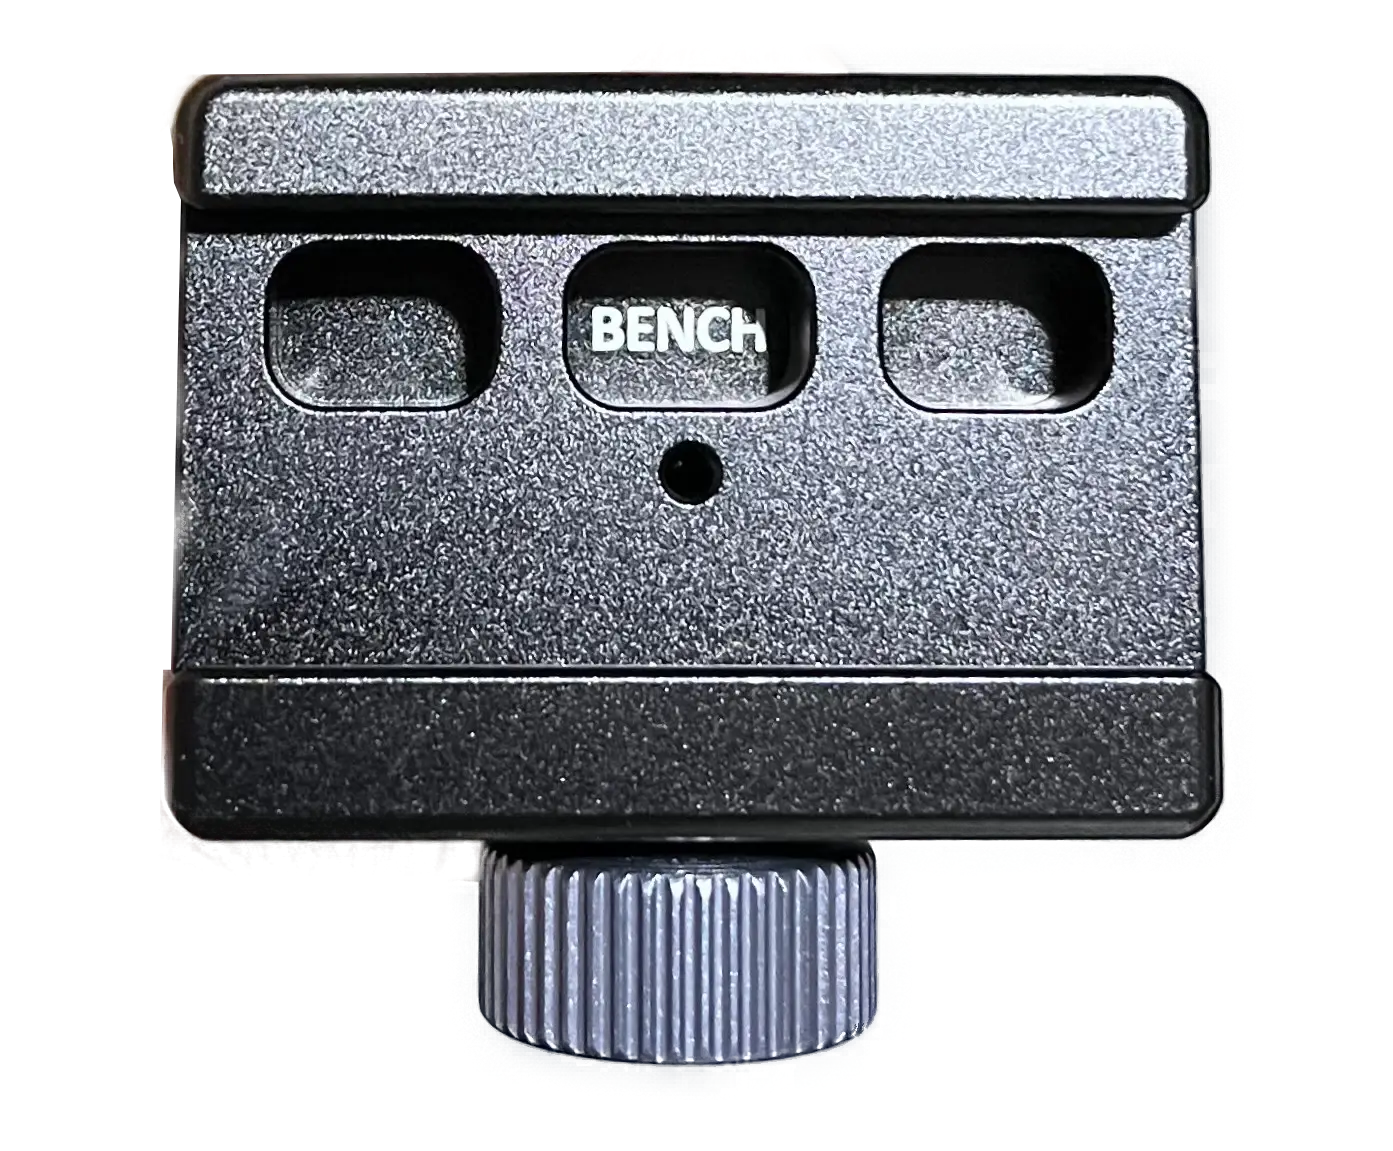
Each leg is marked EDC or BENCH. The shapes differ too: EDC legs are angled at the end, bench legs are straight.
The lids themselves are interchangeable and fit either end of the case.
Watch the video: Leg identification
Fit the EDC legs
The P-EDC runs lying flat, on the horizontal anchor points. Some lids mention "vertical or horizontal anchor points"; standing the unit upright is not supported. You can also skip the legs and run the P-EDC on a table or other raised surface.
Watch the video: EDC deployment
- Find the anchor points on the bottom of the case.
- Align a leg with the center of an anchor point, with the locking knob facing inward, toward the middle of the case.
- Tighten the knob until the leg is snug.
- Repeat for the second leg.
- Set the P-EDC down on firm, level ground and check it doesn't rock.
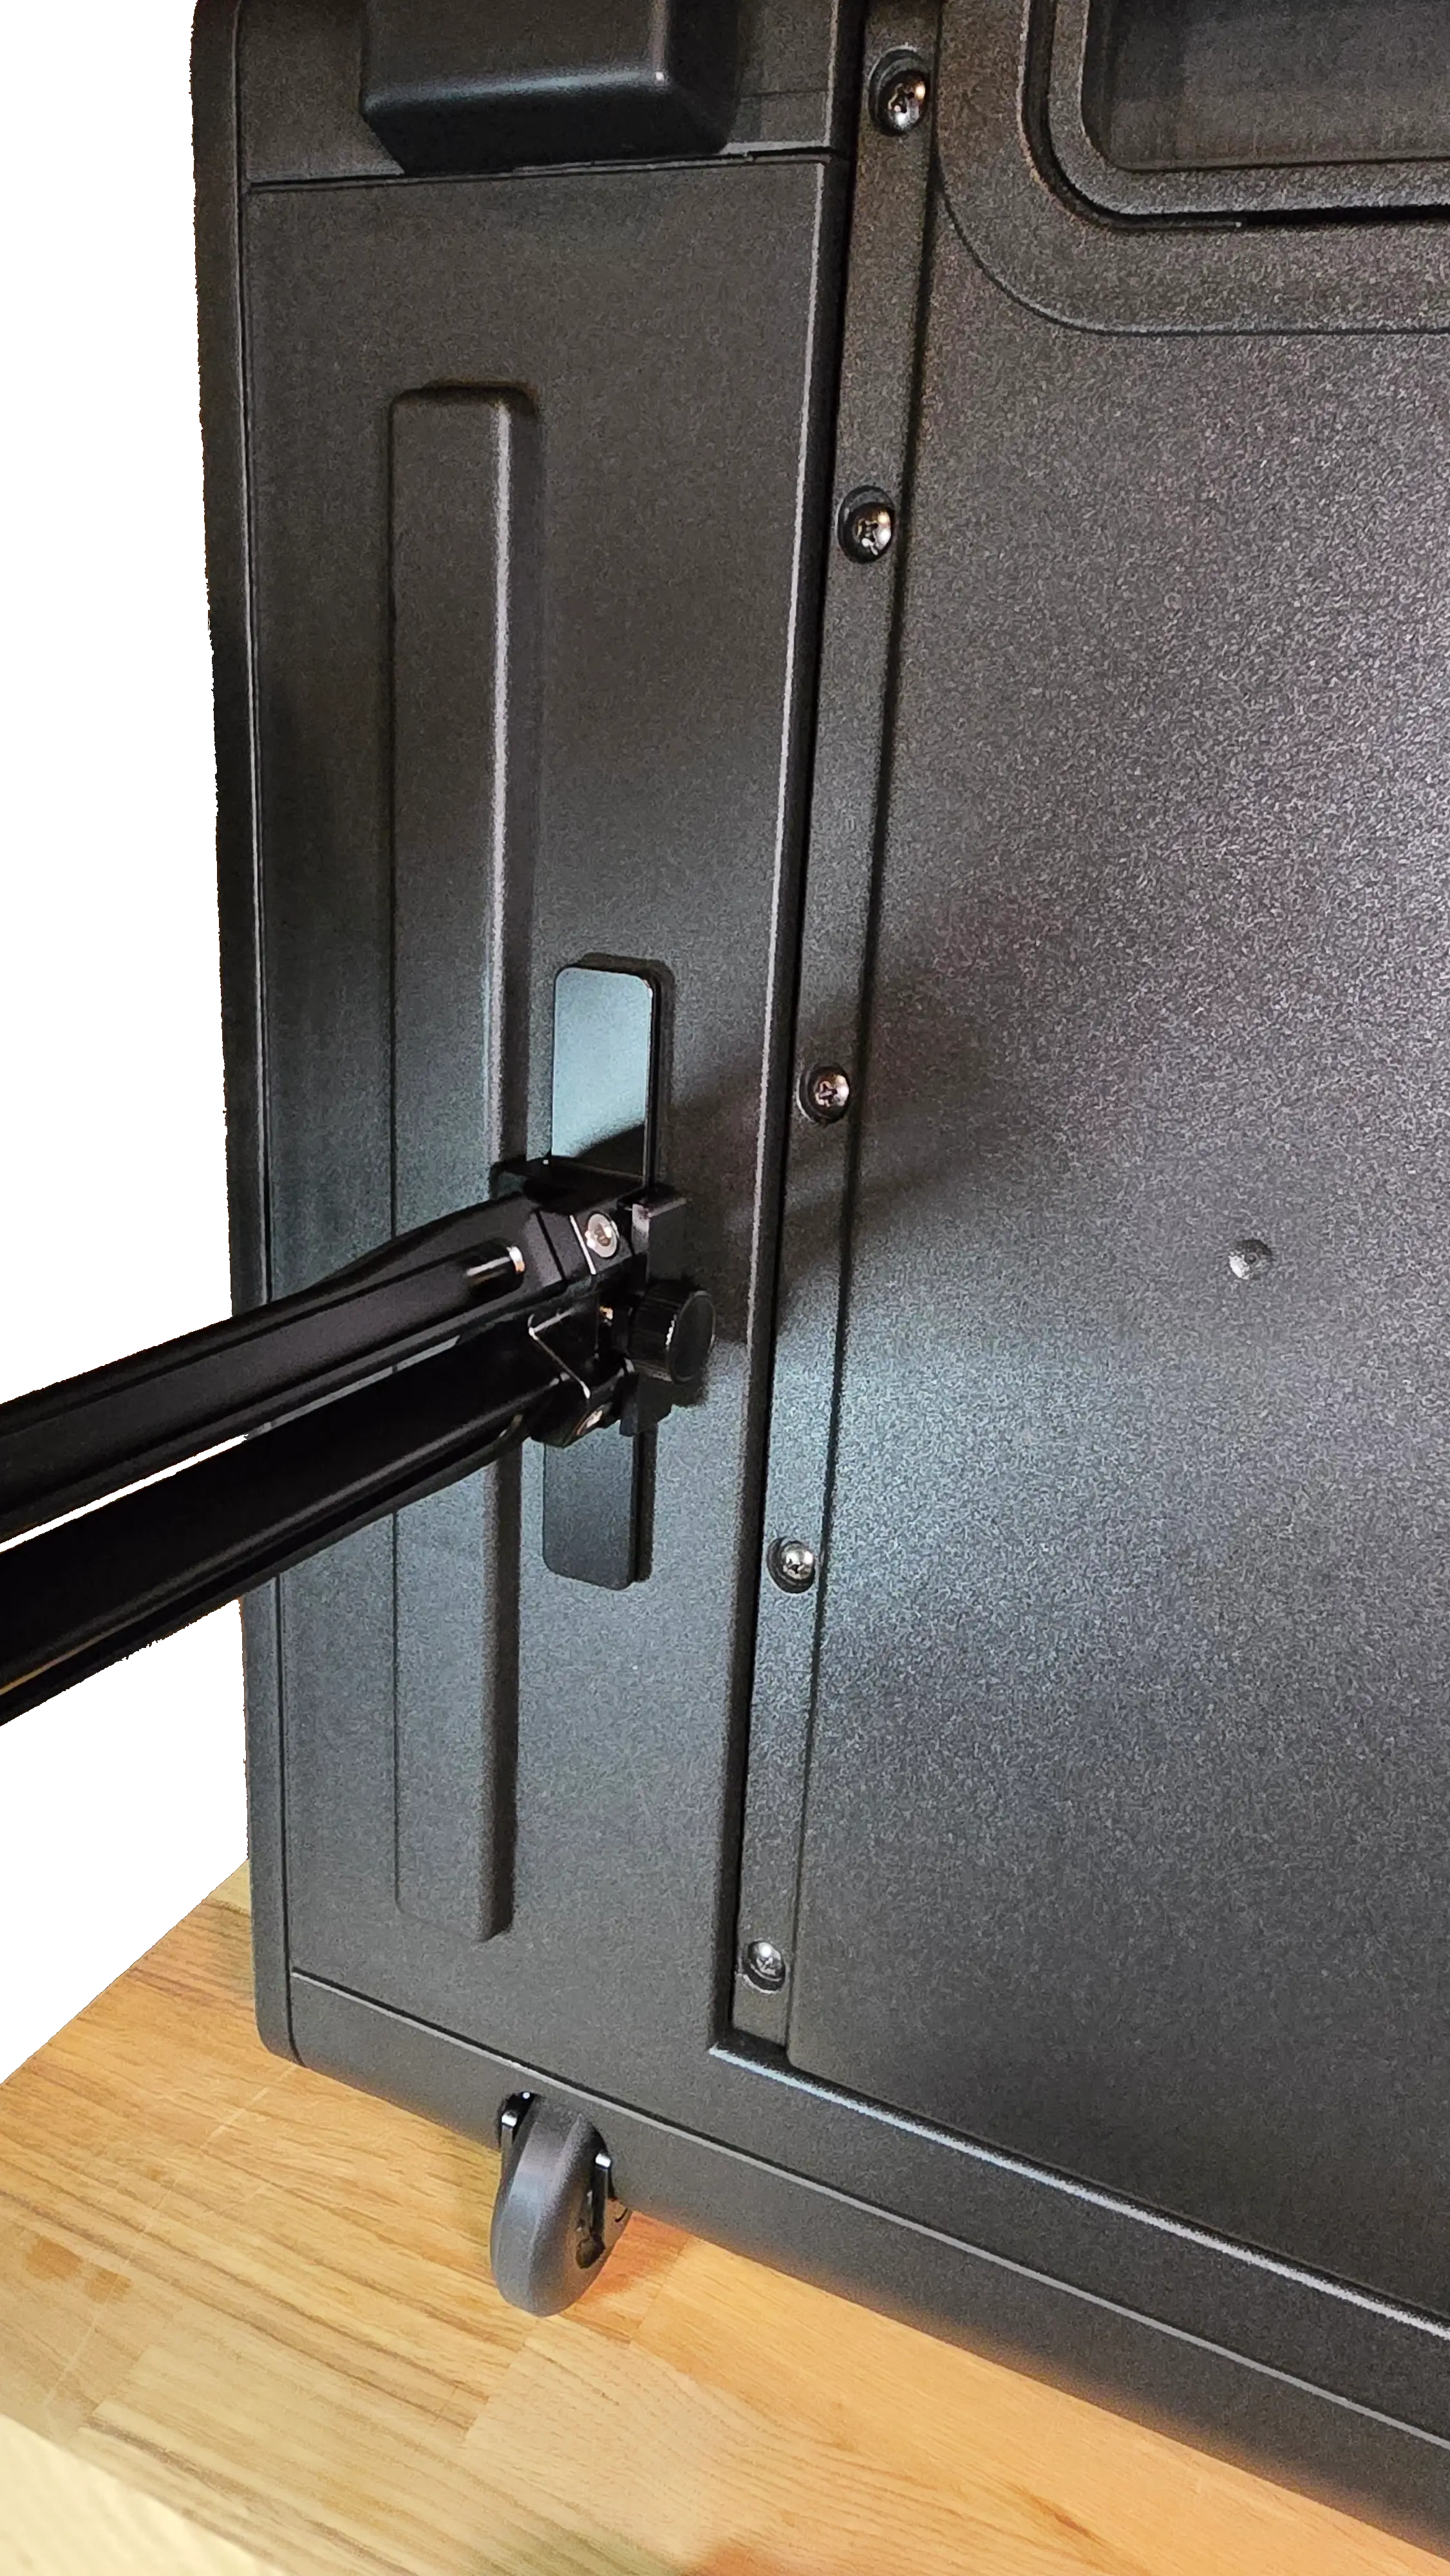
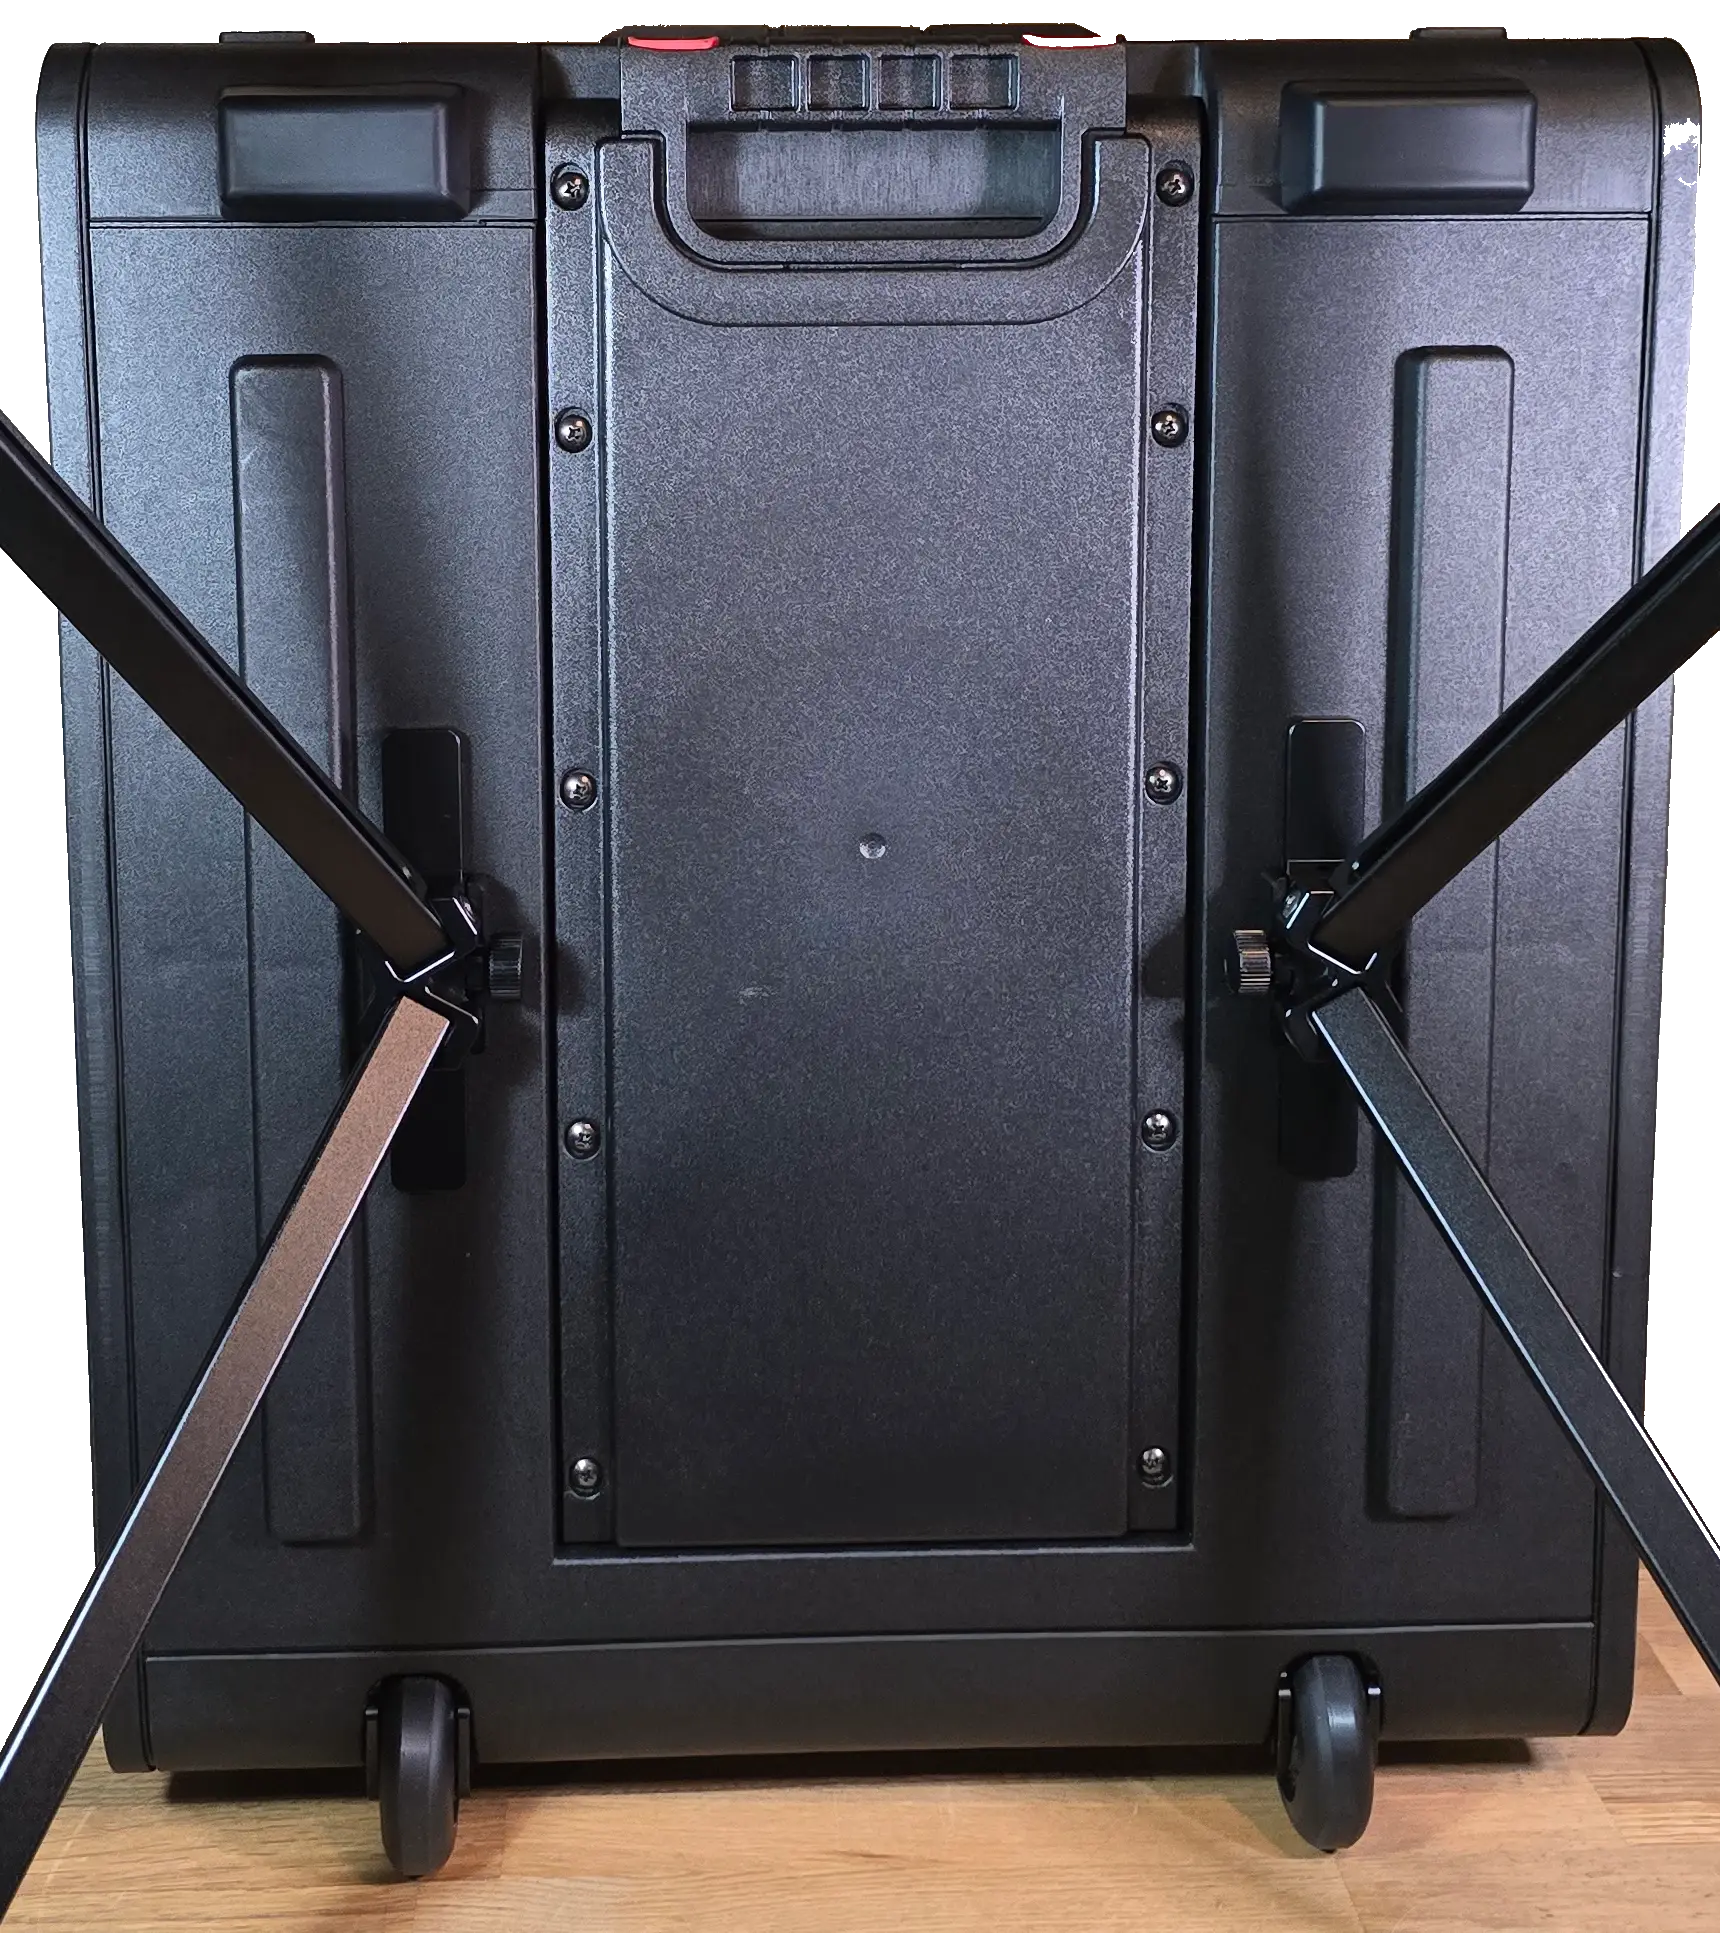
The legs have one fixed height (10.6 in) and stand on a 26.5 × 26.5 in footprint. The top of the case sits about 1.7 ft off the ground.
Set up the bench (optional)
The bench stands on its own, next to the P-EDC.
Watch the video: Workbench assembly
- Turn Lid 2 upside down and find the anchor points on its underside.
- Align a bench leg with an anchor point, knob facing inward, and tighten the knob.
- Repeat for the second leg.
- Extend both legs fully and turn the bench over onto its legs.
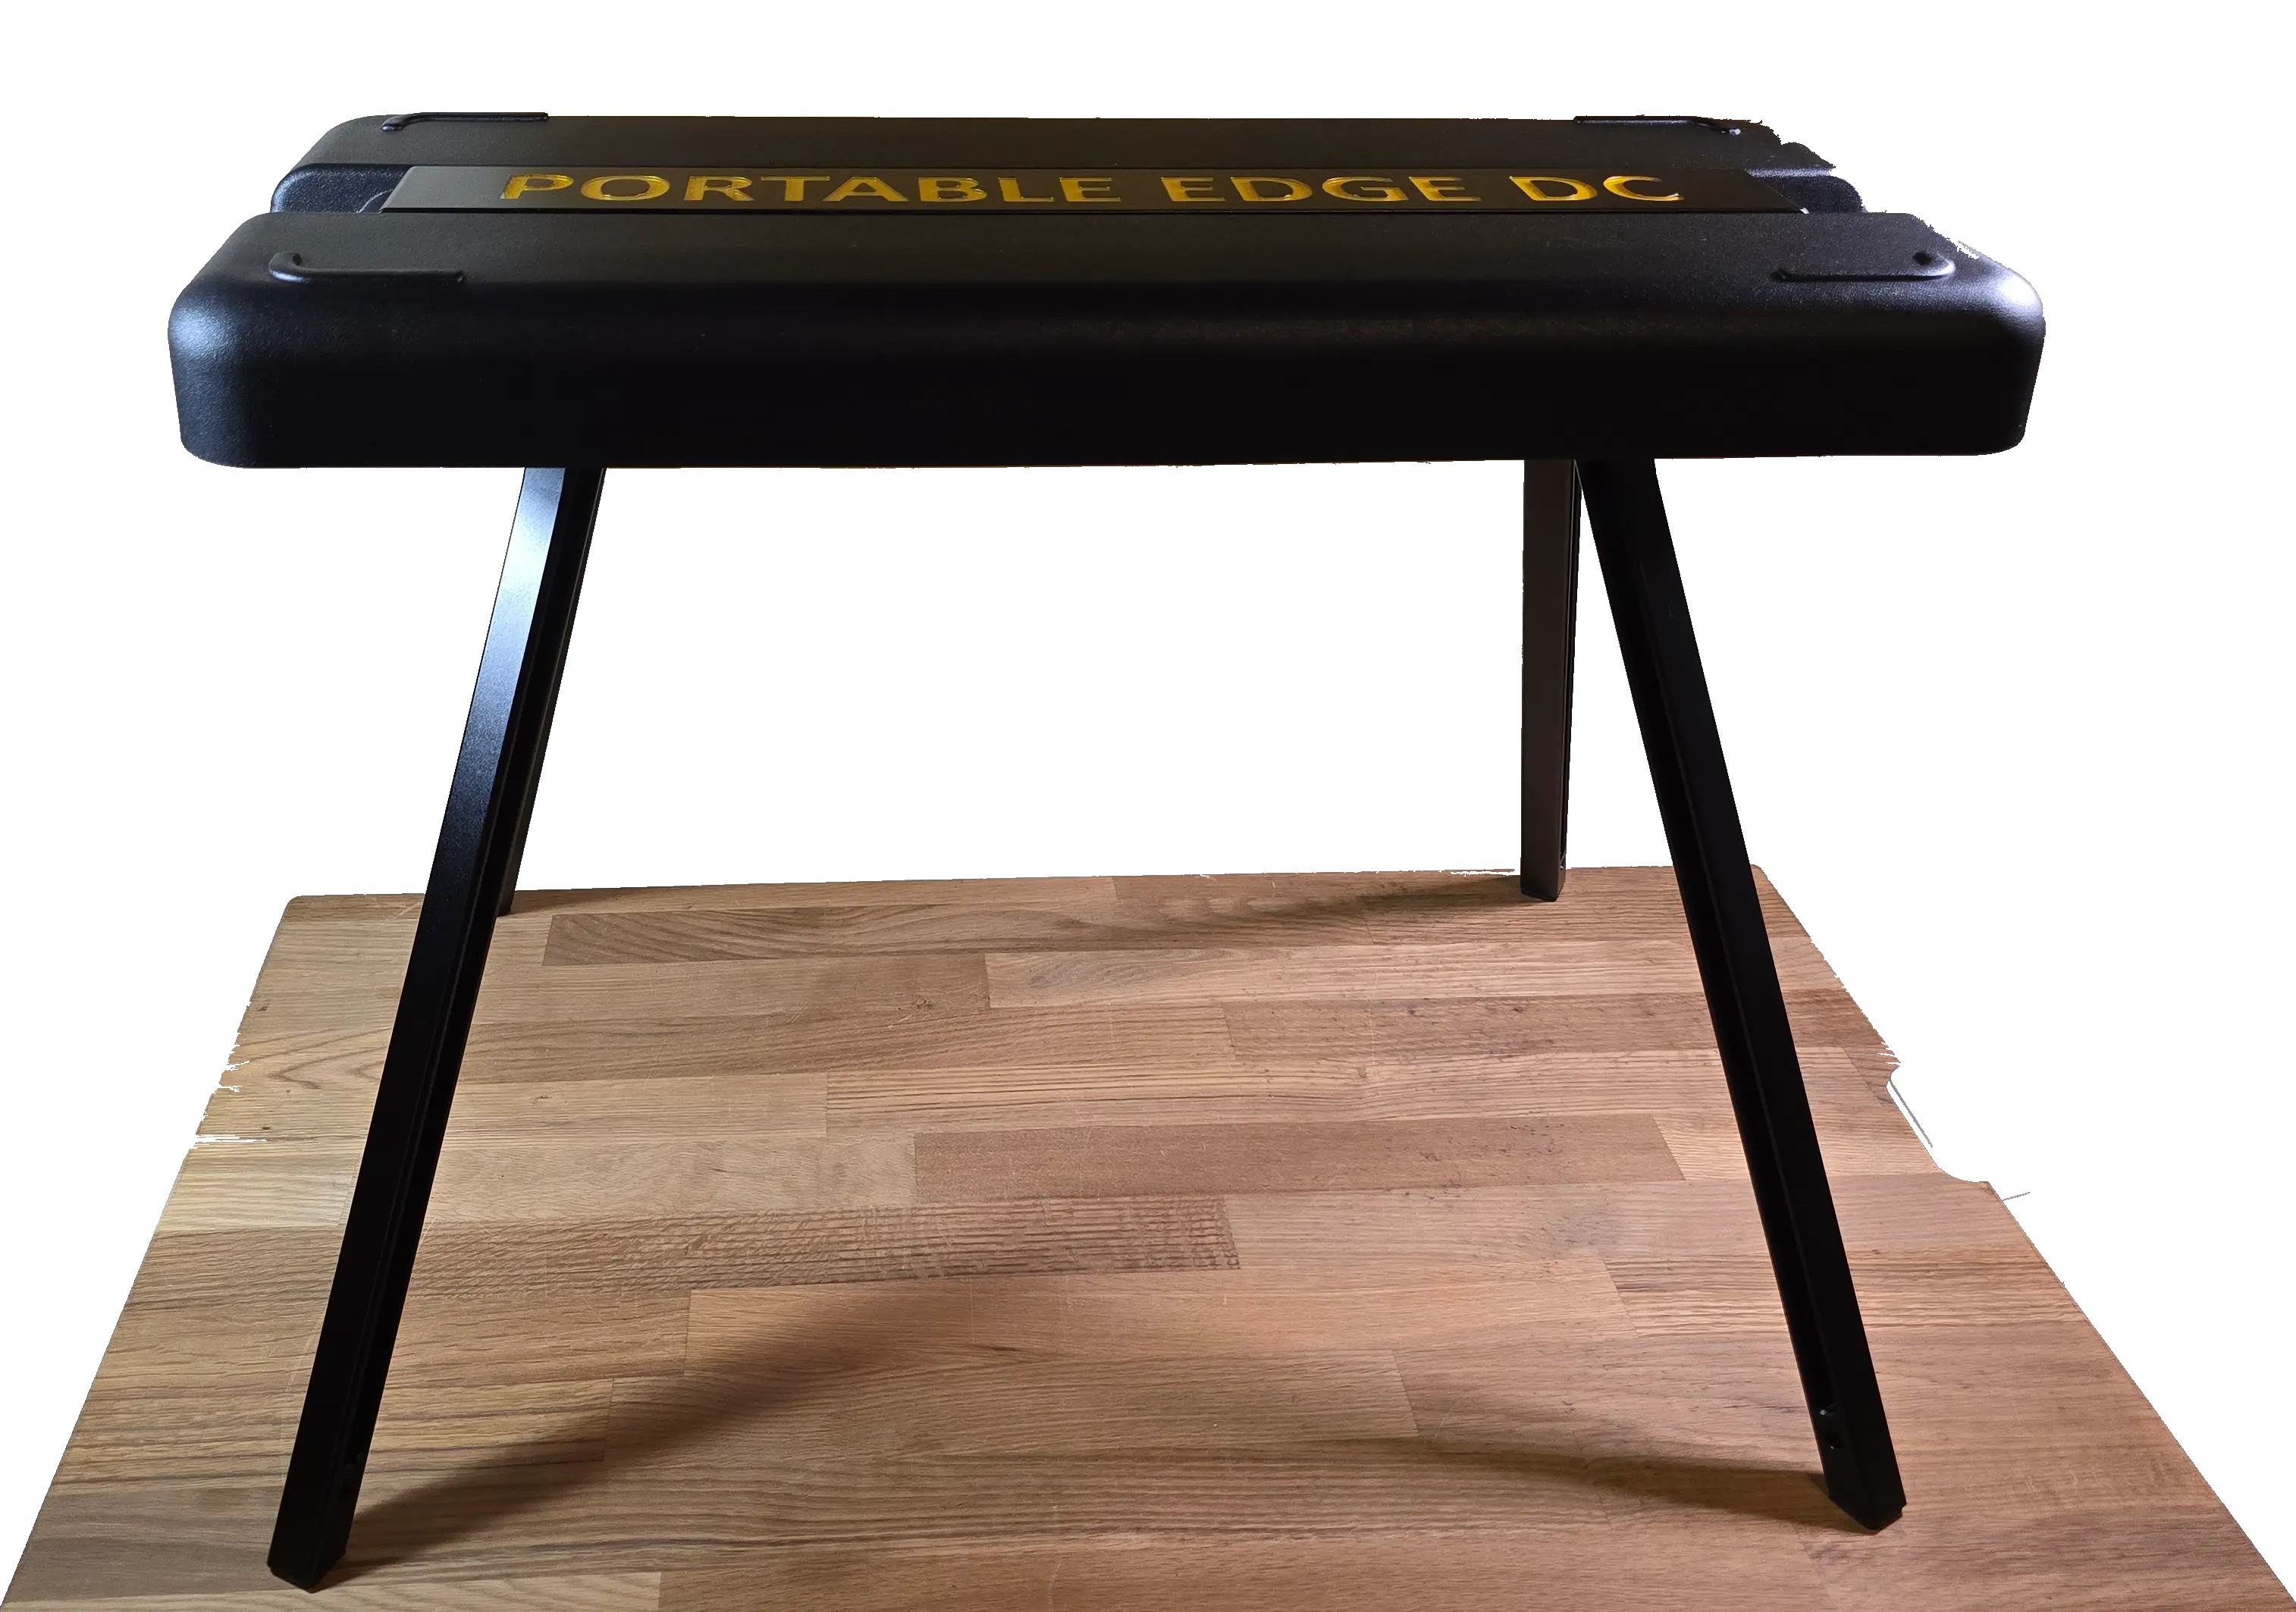
Check the bench is stable before sitting. 220 lb (100 kg) maximum, sitting only. Never stand on it.
Add the work surface (optional)
Lid 1 mounts on the bench as a light work surface for a laptop or tools.
- With both lids upside down, unscrew the side knob on the underside of Lid 2 and take out the Work Surface Arm.
- Slide the arm into the anchor on the left side of Lid 2, top to bottom, until it clicks.
- Turn the bench back over onto its legs.
- On Lid 1, rotate the two arms next to the pole storage 90° outward. Work around the extension pole if it is still in the lid.
- Loosen the Work Surface Arm knob, slide Lid 1's arms into the channel, and tighten the knob.
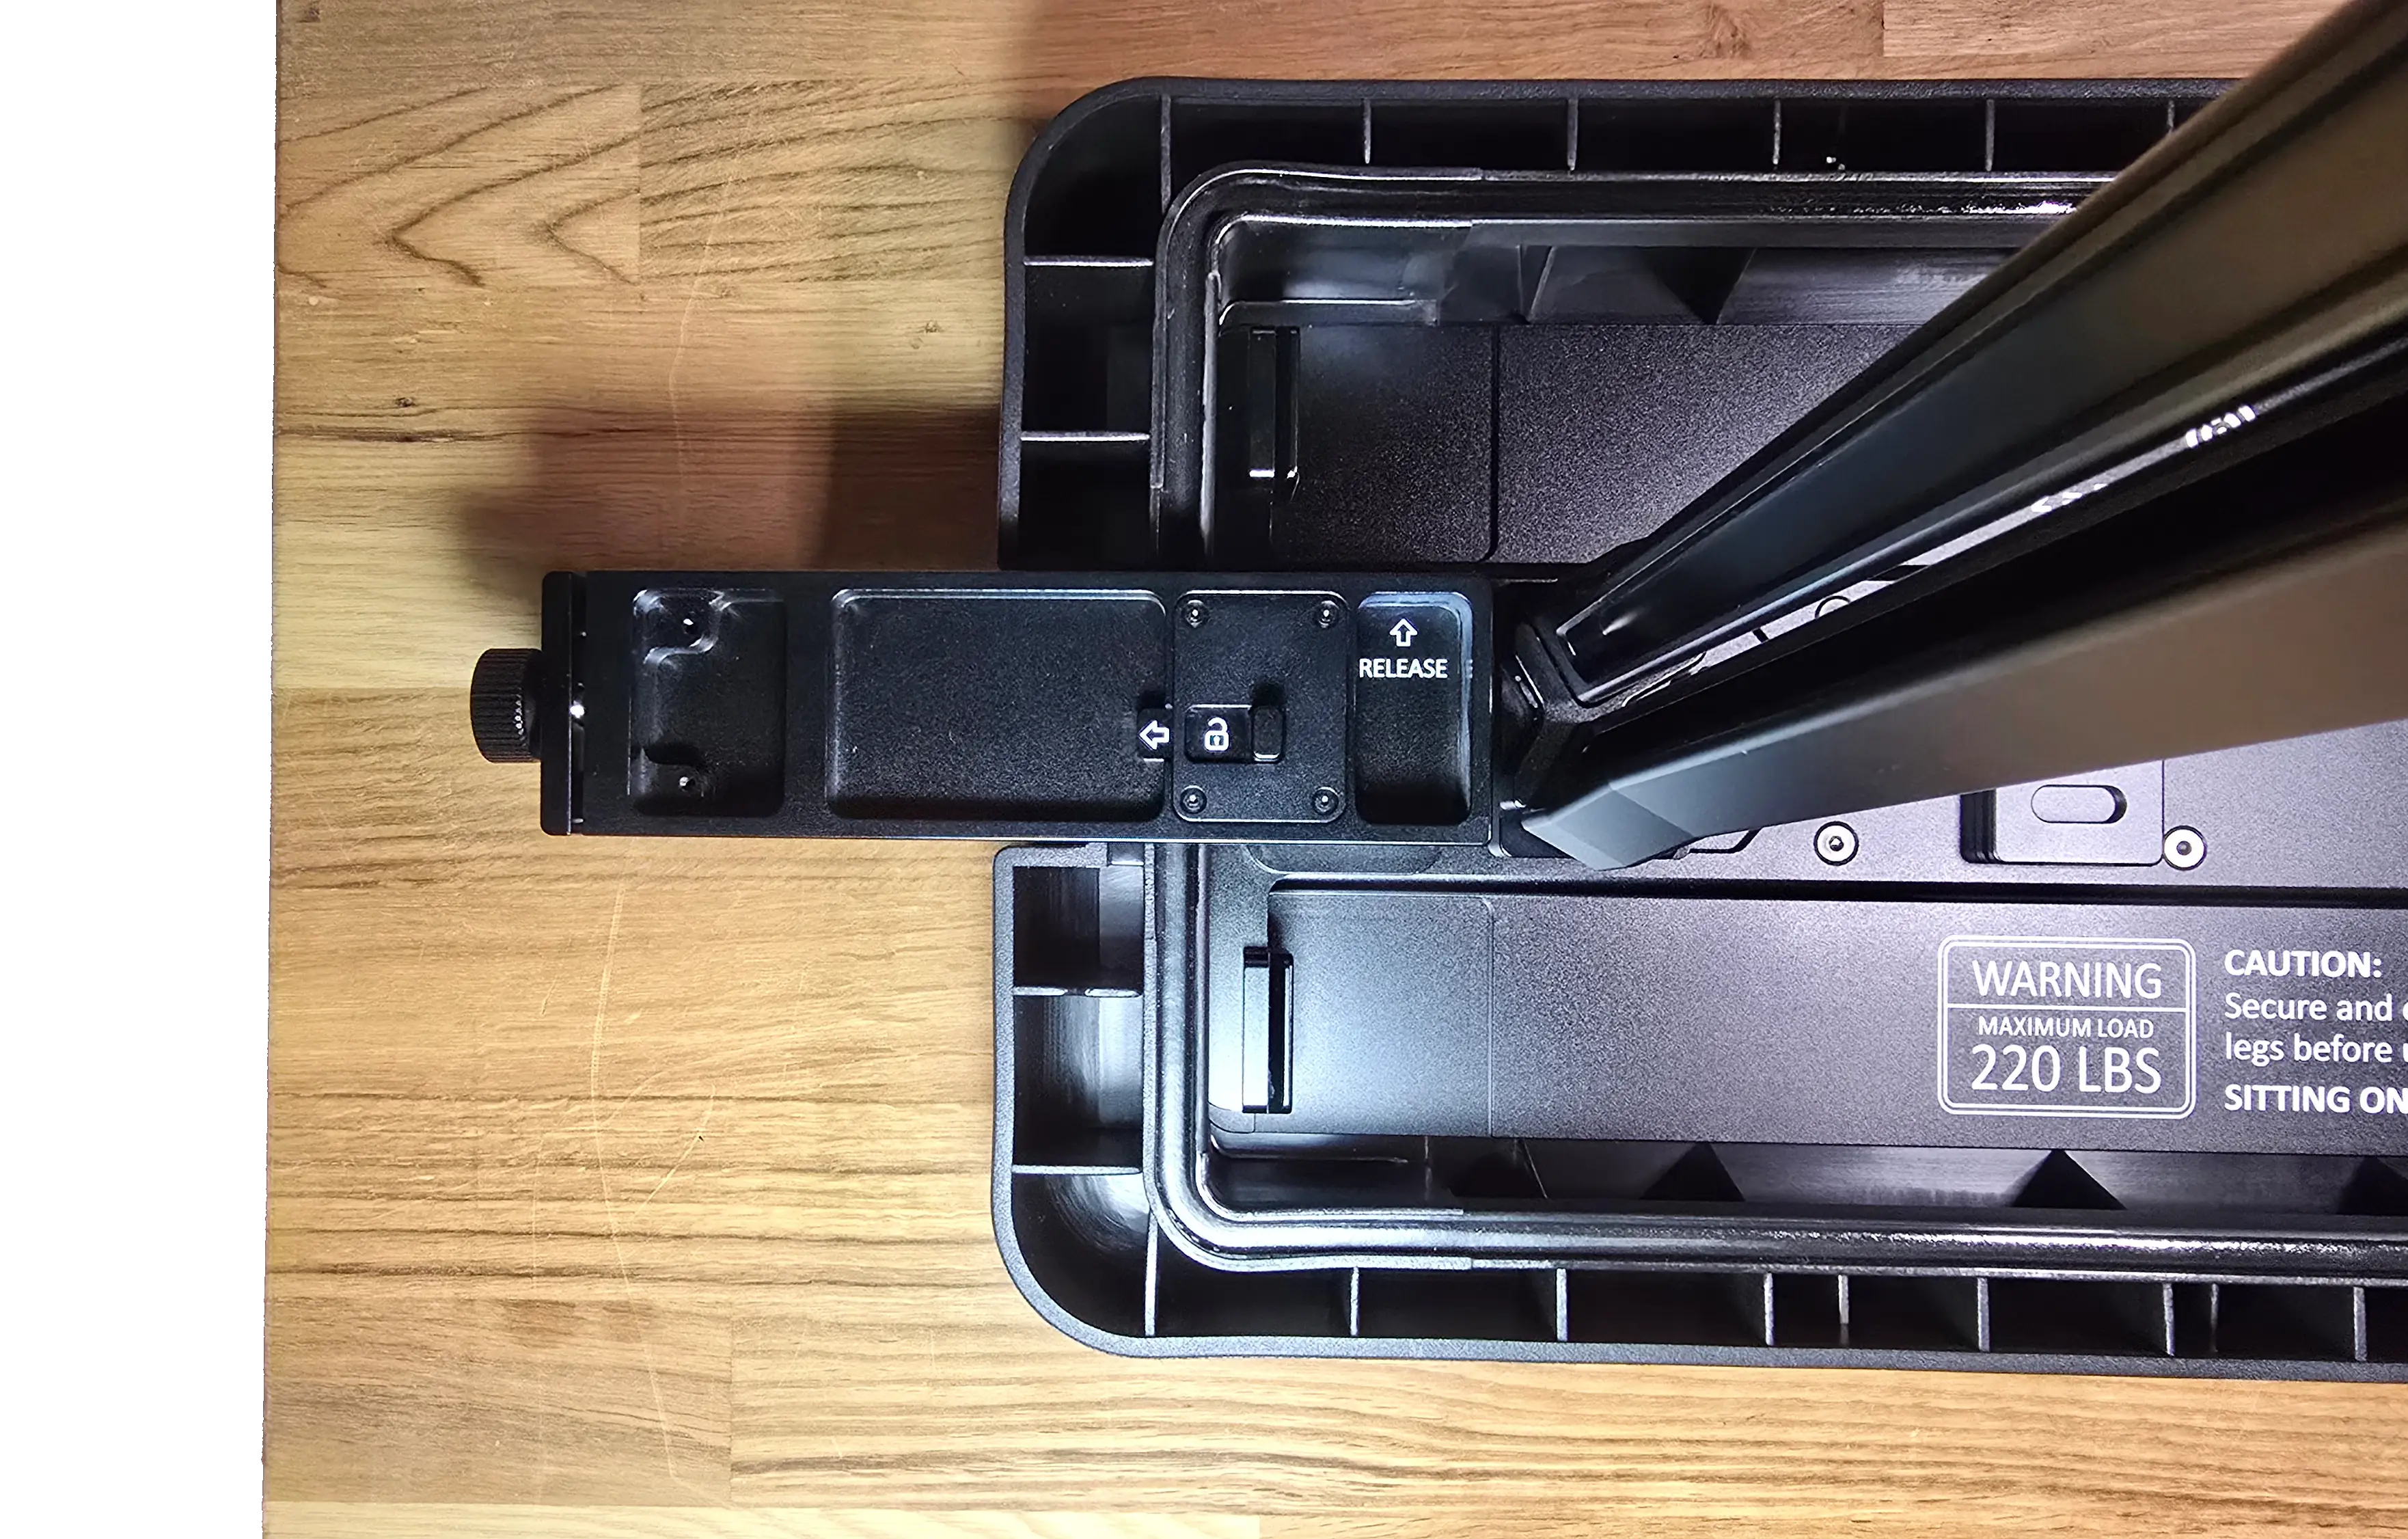
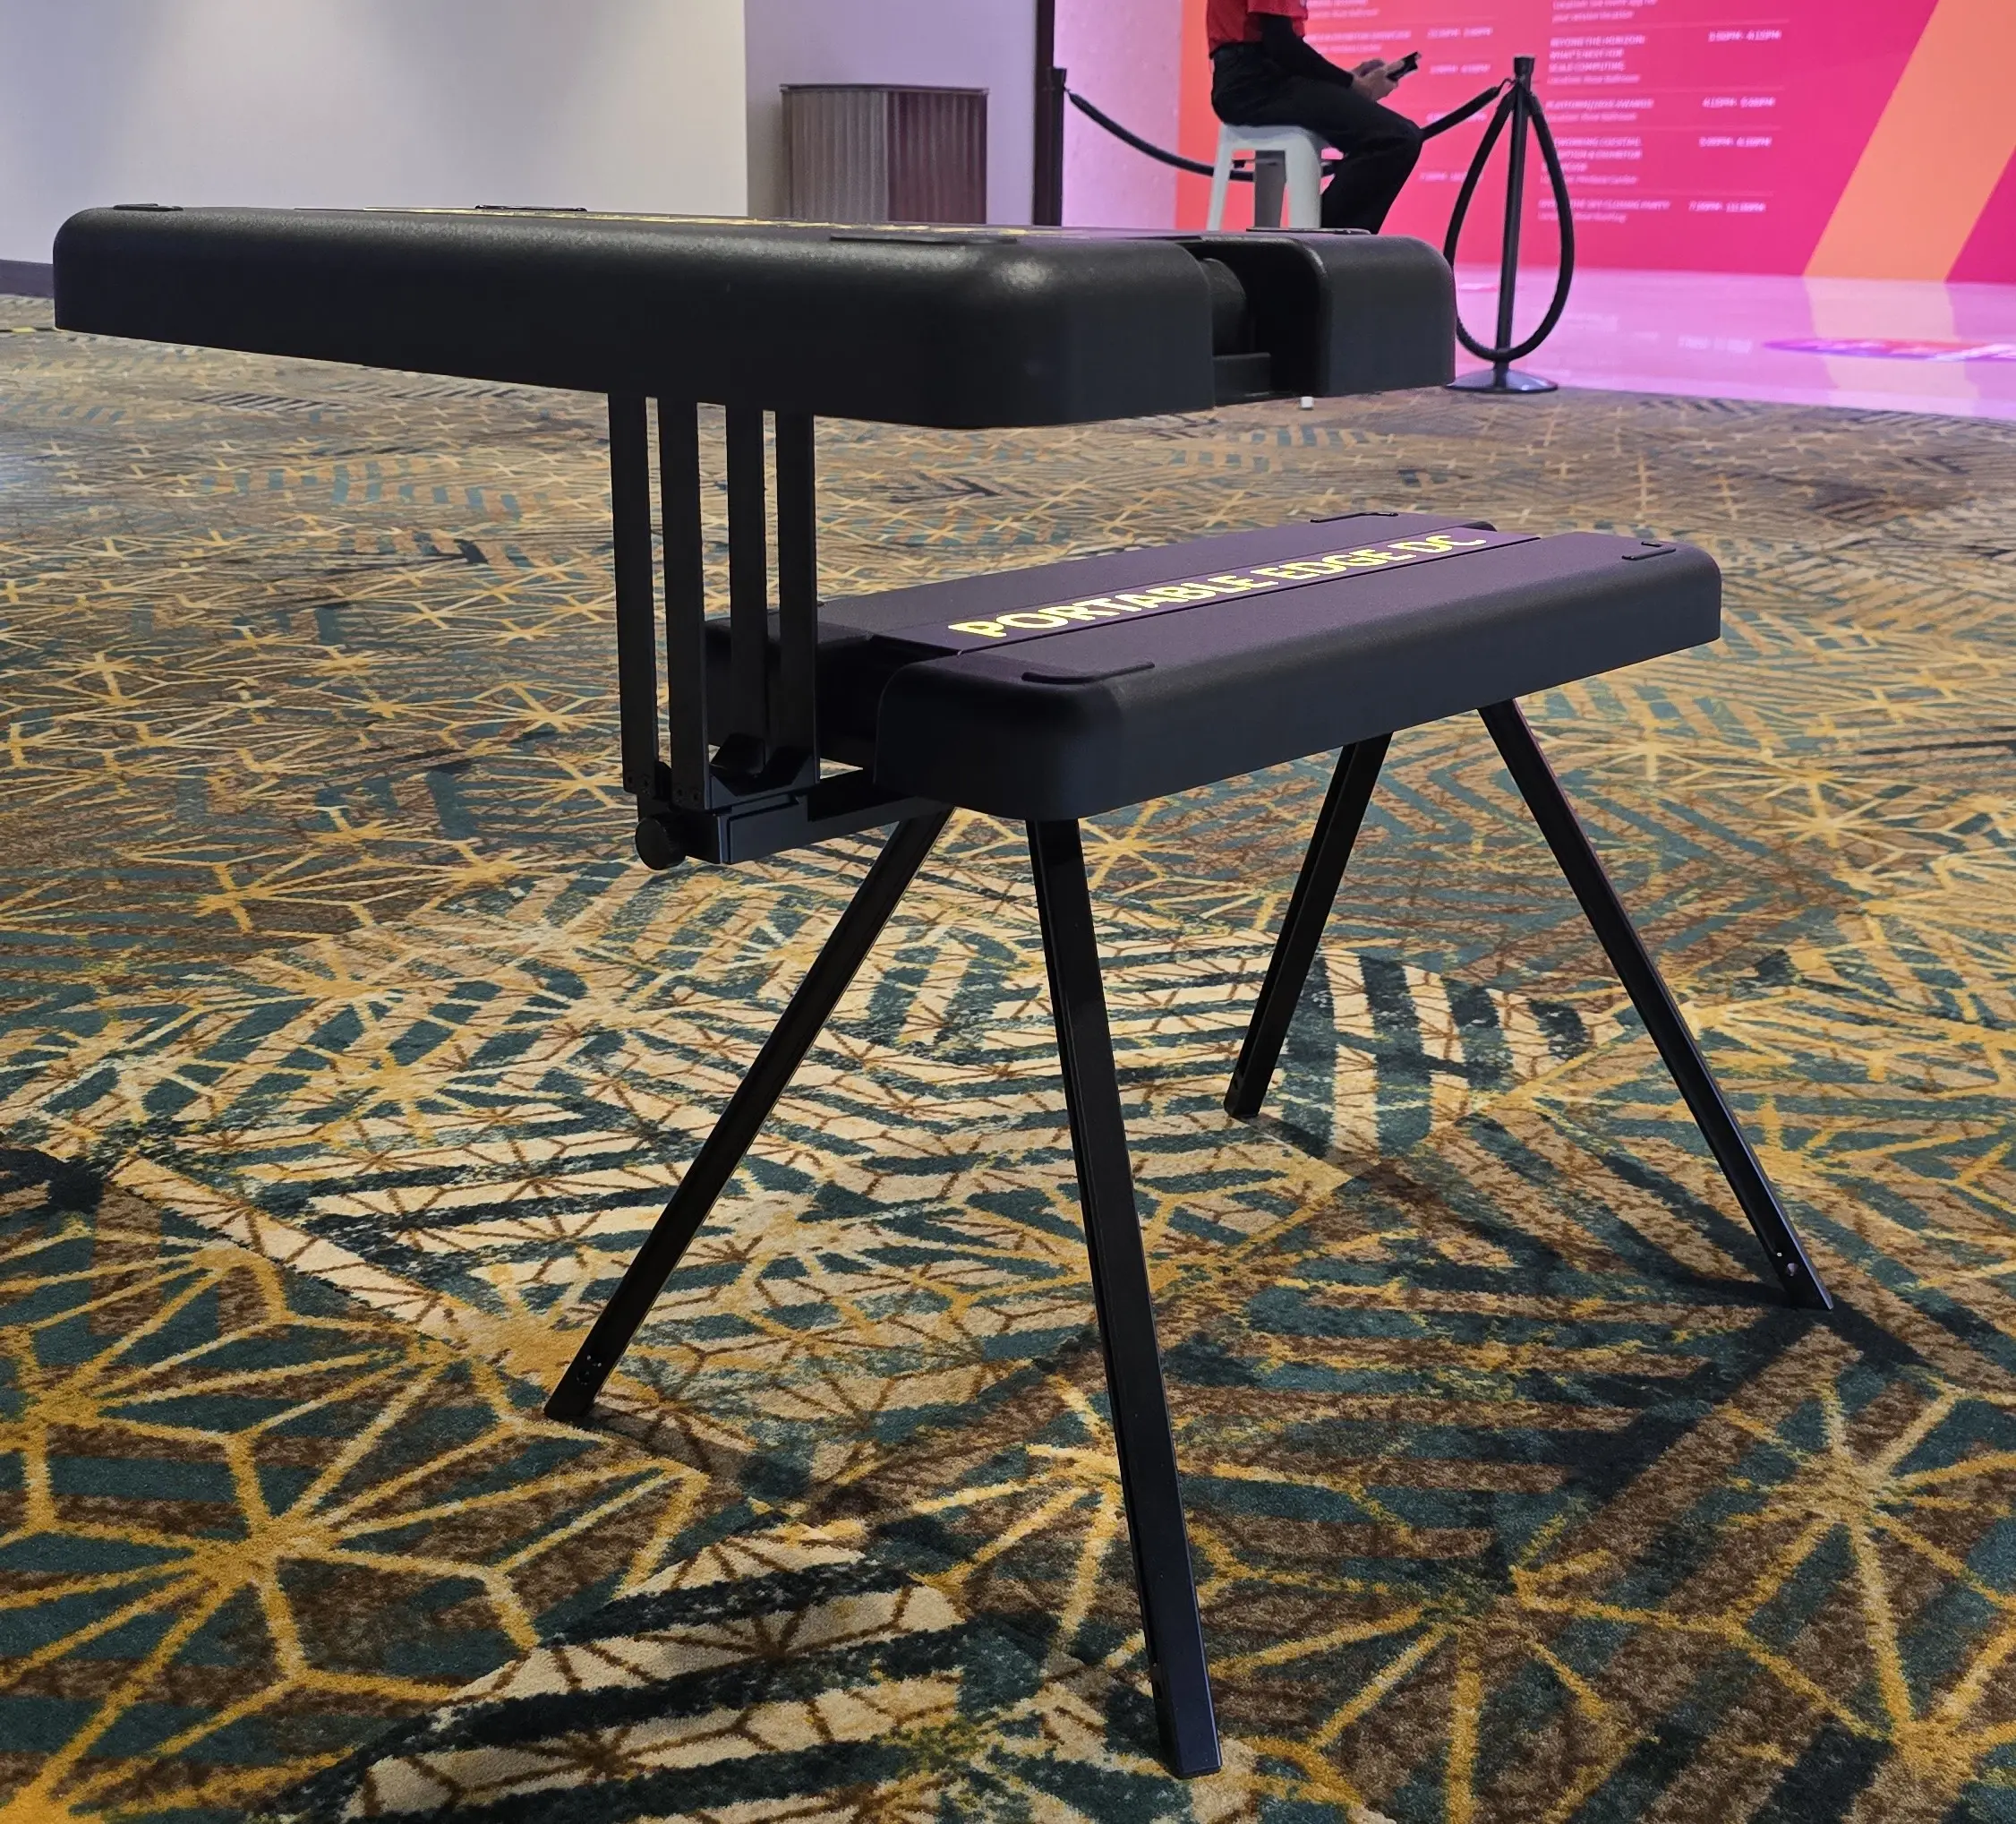
8 lb (3.6 kg) maximum on the work surface. Keep items in the center. A hard knock on the side can detach it from the bench.
If something doesn't fit
- Leg won't lock: check the knob faces inward and the leg is centered, then tighten fully.
- Work Surface Arm won't click: check it isn't upside down, and slide it with gentle pressure.
- Bench and work surface wobble: tighten every knob, and move the bench to level ground.
Next: Gateway and Mast